Easy Crochet Beanie: Beginner Free Pattern & Supplies
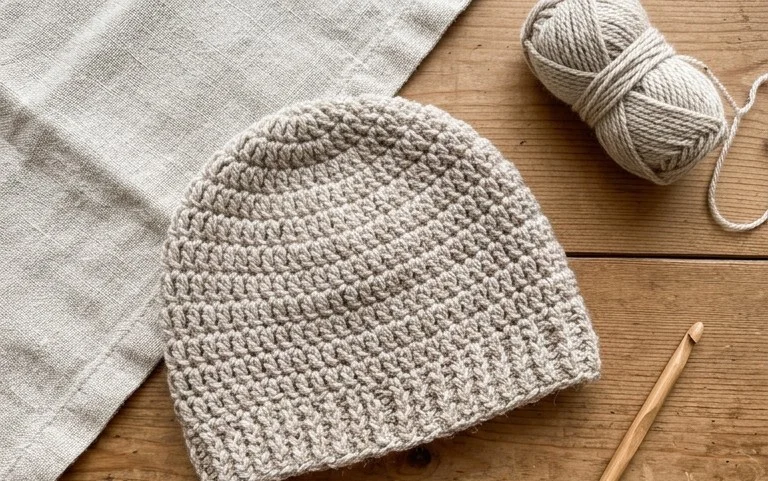
This hat has a squishy, dense feel that stays warm even on the windiest days. Because it uses simple post stitches, it creates a thick ribbing that holds its shape through every wash cycle. Beginners find this project especially satisfying because the construction relies on basic rounds that move quickly beneath your fingers. You will finish with a classic accessory that fits comfortably without stretching out over time. This guide covers every essential item you need to gather, from picking the right weight of yarn to selecting the correct hook sizes for a clean, professional finish.
Why You’ll Love This Pattern
This classic crochet beanie provides an ideal entry point for anyone looking to master the technique of working in the round. It relies on a foundational stitch pattern that balances speed with structural integrity, ensuring you finish the hat in just a few sittings. Because it uses a simple combination of post stitches and basic crochet, the finished fabric features a dense, warm texture that mimics expensive ribbed knitwear. It serves as an excellent stash-buster, as you can complete an adult-sized hat with less than 200 yards of medium-weight yarn.
I managed to finish this hat in one weekend, and the instructions for the decreases made the crown look perfectly flat without any weird bumps.
— Sarah, intermediate crocheter
Pattern Overview & Skill Level
- Skill Level: Beginner
- Approximate Time: 3 to 5 hours
- Construction: Worked in joined rounds from the bottom up, beginning with the brim ribbing and transitioning to the main body.
- Finished Dimensions & Sizing: Adult Medium (fits 21-23 inch head circumference), 8.5 inches tall.
Materials & Supplies Needed
- Yarn: Worsted weight (#4), 100% acrylic or wool blend, approximately 180 yards.
- Hook Size: 5.0 mm (H-8) for the body and 4.5 mm (G-7) for the brim ribbing.
- Notions: Tapestry needle, stitch markers, scissors, and a measuring tape.
- Yarn Substitutions: You may use cotton yarn, though it will result in a heavier, less stretchy hat. If using a thinner sport-weight yarn, increase your starting chain and row count to maintain the final gauge.
Stitch Guide & Abbreviations (US Terms)
- ch = chain
- sc = single crochet
- dc = double crochet
- sl st = slip stitch
- FPdc = front post double crochet (yarn over, insert hook from front to back to front around the post of the stitch below, pull up a loop, complete as a normal dc)
- BPdc = back post double crochet (yarn over, insert hook from back to front to back around the post of the stitch below, pull up a loop, complete as a normal dc)
- st/sts = stitch/stitches
- dec = decrease (sc2tog)
Step-by-Step Pattern Instructions
Brim Ribbing
Using the 4.5 mm hook, ch 10.
- Row 1: Sc in 2nd ch from hook and each ch across. Turn. (9 sts)
- Rows 2–72: Ch 1, working in BLO, sc in each st across. Turn. (9 sts)
- Join: Fold the strip in half, matching the foundation ch to the last row. Sl st through both layers to create a circle. Turn the piece right-side out.
Hat Body
Switch to the 5.0 mm hook. Rotate the work to crochet along the long edge of the brim.
- Rnd 1: Ch 2, dc evenly around the edge of the brim, placing one dc per rib row. Join with a sl st to the first dc. (72 sts)
- Rnd 2: Ch 2, *FPdc around next st, BPdc around next st; repeat from * around. Join with a sl st. (72 sts)
- Rnds 3–15: Repeat Rnd 2. (72 sts)
Crown Shaping
- Rnd 16: Ch 2, *FPdc, BPdc, dc2tog; repeat from * around. Join. (54 sts)
- Rnd 17: Ch 2, *FPdc, dc2tog; repeat from * around. Join. (36 sts)
- Rnd 18: Ch 2, *dc2tog around. Join. (18 sts)
- Rnd 19: Ch 2, *dc2tog around. Join. (9 sts)
Cut yarn, leaving a 10-inch tail. Use the tapestry needle to weave the tail through the remaining 9 stitches, pull tightly to close the hole, and knot securely on the inside.
Care & Washing Instructions
- Machine wash on a gentle cycle in cool water (max 30°C).
- Lay flat on a clean towel to air dry, reshaping the ribbing while damp.
- Avoid using bleach or high heat, which can damage synthetic fibers and cause the stitches to lose their elasticity.
Pro Tips & Common Mistakes to Avoid
- Check your tension by completing a small swatch before starting the brim, as loose tension makes the ribbing look baggy.
- Place a stitch marker at the beginning of every round to keep track of your stitch count, especially during the decrease rounds.
- Weave in your ends by traveling through the underside of the stitches rather than knotting them, which prevents unsightly bumps on the surface.
- If you wish to make the hat larger, add stitches in multiples of 2 during the first round of the body; note that this will require approximately 15 extra yards of yarn.
Frequently Asked Questions
Can I use a larger hook if my stitches feel too tight?
Yes, increasing your hook size by 0.5 mm is a standard way to achieve better drape, though it may result in a slightly larger hat size.
Is this pattern suitable for complete beginners?
This is an excellent project for beginners who have mastered basic rows and want to learn how to transition to working in rounds and post stitches.
Can I sell the hats I make from this pattern?
You are welcome to sell finished items made from this pattern, provided you credit the designer and use your own original photographs.
How do I adjust the hat to be slouchier?
To add more length, repeat the ribbing rounds for an additional 10 to 15 rounds before starting the crown decreases.
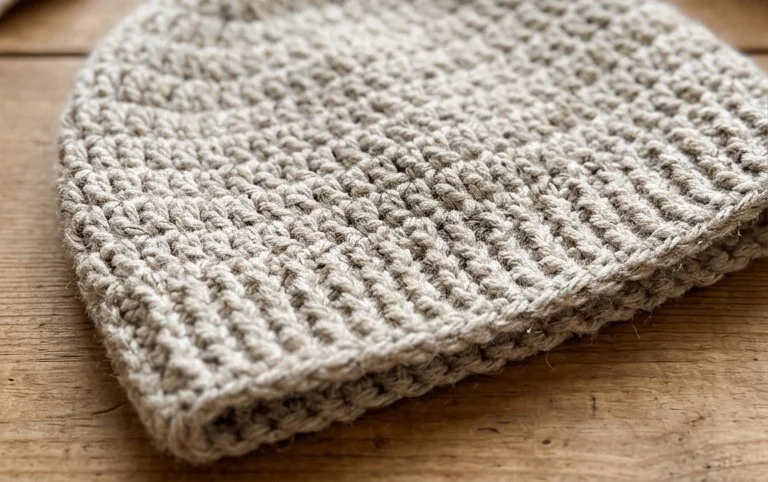
Your finished hat brings a cozy, handmade touch to any outfit, and it makes a thoughtful gift for friends or family. For a lighter version during the transition into spring, try using a blend of bamboo and linen to achieve a beautiful drape. I love seeing how your project turns out, so please share a photo of your work on your favorite social media platform. You can find more free patterns and project guides waiting for you on the blog whenever you are ready for another creative afternoon.